1 + 1Computing setup
We will use R and Python in this course and use Positron as our IDE. You will also need Git. You have two options for computing environment – departmental server or local installation.
Set up
Option 1: Departmental server
This option is for students who prefer to get up and running quickly, with minimal frustration. There is absolutely nothing wrong with choosing this option. In fact, it’s the option I would recommend for most, if not all, of you. And note that this is not a forever commitment; at any point in the semester you can choose to install things locally and start using Option 2.
Step 1: Access the server and launch a session
The Posit Workbench server has been set up for you to get up and running without installing and setting up software locally. You can access it https://rstudio.stat.duke.edu.
Note that this requires Duke Net ID log in. Additionally, if you’re not on the DukeBlue network, you will need to connect to Duke’s VPN first, and then you can connect to the server and access Positron.
Log in with your Duke Net ID, then click on New Session and select Positron. You might need to wait a bit (~30 seconds) for the session to launch, please be patient.
Once Positron has launched, go to the Console and type
R should return an answer: 2. You’re good to go to the next step!
Step 2: Configure GitHub authentication
Begin by creating a public private key pair using the credentials package, run the following line in the Console:
credentials::ssh_setup_github()The function will first prompt you to create an SSH key pair if one does not already exist
## No SSH key found. Generate one now?
##
## 1: Yes
## 2: No
##
## Selection:
Select Yes by entering 1 and hitting enter. The key pair will be generated and the resulting public key will be printed,
## Generating new RSA keyspair at: /home/guest/.ssh/id_rsa
## Your public key:
##
##  ssh-rsa AAAAB3NzaC1yc2EAAAADAQABAAABAQC5KwynraqqA4O91nOBtyuJMhYoeCAroSv7yC/GTXcjXsBvgYAlL0PCurJP7uRFbvkUaoBvuaGohR1qDlYNNWzH5FBDqftY+o35otq88mhDUaOmCzuik+MCLGiS/hp2D+5imc1Vqjabvk3fexMr7qkHrJE04vB/ZzI0iZzoZ0zGIJSistNODhrt6jCK7OzPFb4/lGGDxp0+vaGKeXIQGGdUwvMUD+HyNqTgO+g7rcdgmnVMWhhLH8uNb7tpQwDbRQu1h4R+xHO9JMHxFUz2cX4Du6GaQXuYLX3p8X276Nl8CU/V2R4CbGMJwO0Z0jcY8CVUhYBOIJsuS1a5ttHSoLCx
You will then be prompted to enter this public key to GitHub, via the provided link, you can also select Yes here to have the function open a browser window directly to this page.
## Please copy the line above to GitHub: https://github.com/settings/ssh/new
## Would you like to open a browser now?
##
## 1: Yes
## 2: No
##
## Selection:
If you are not logged into GitHub the website will ask you to do so, once logged in you should see the following form:
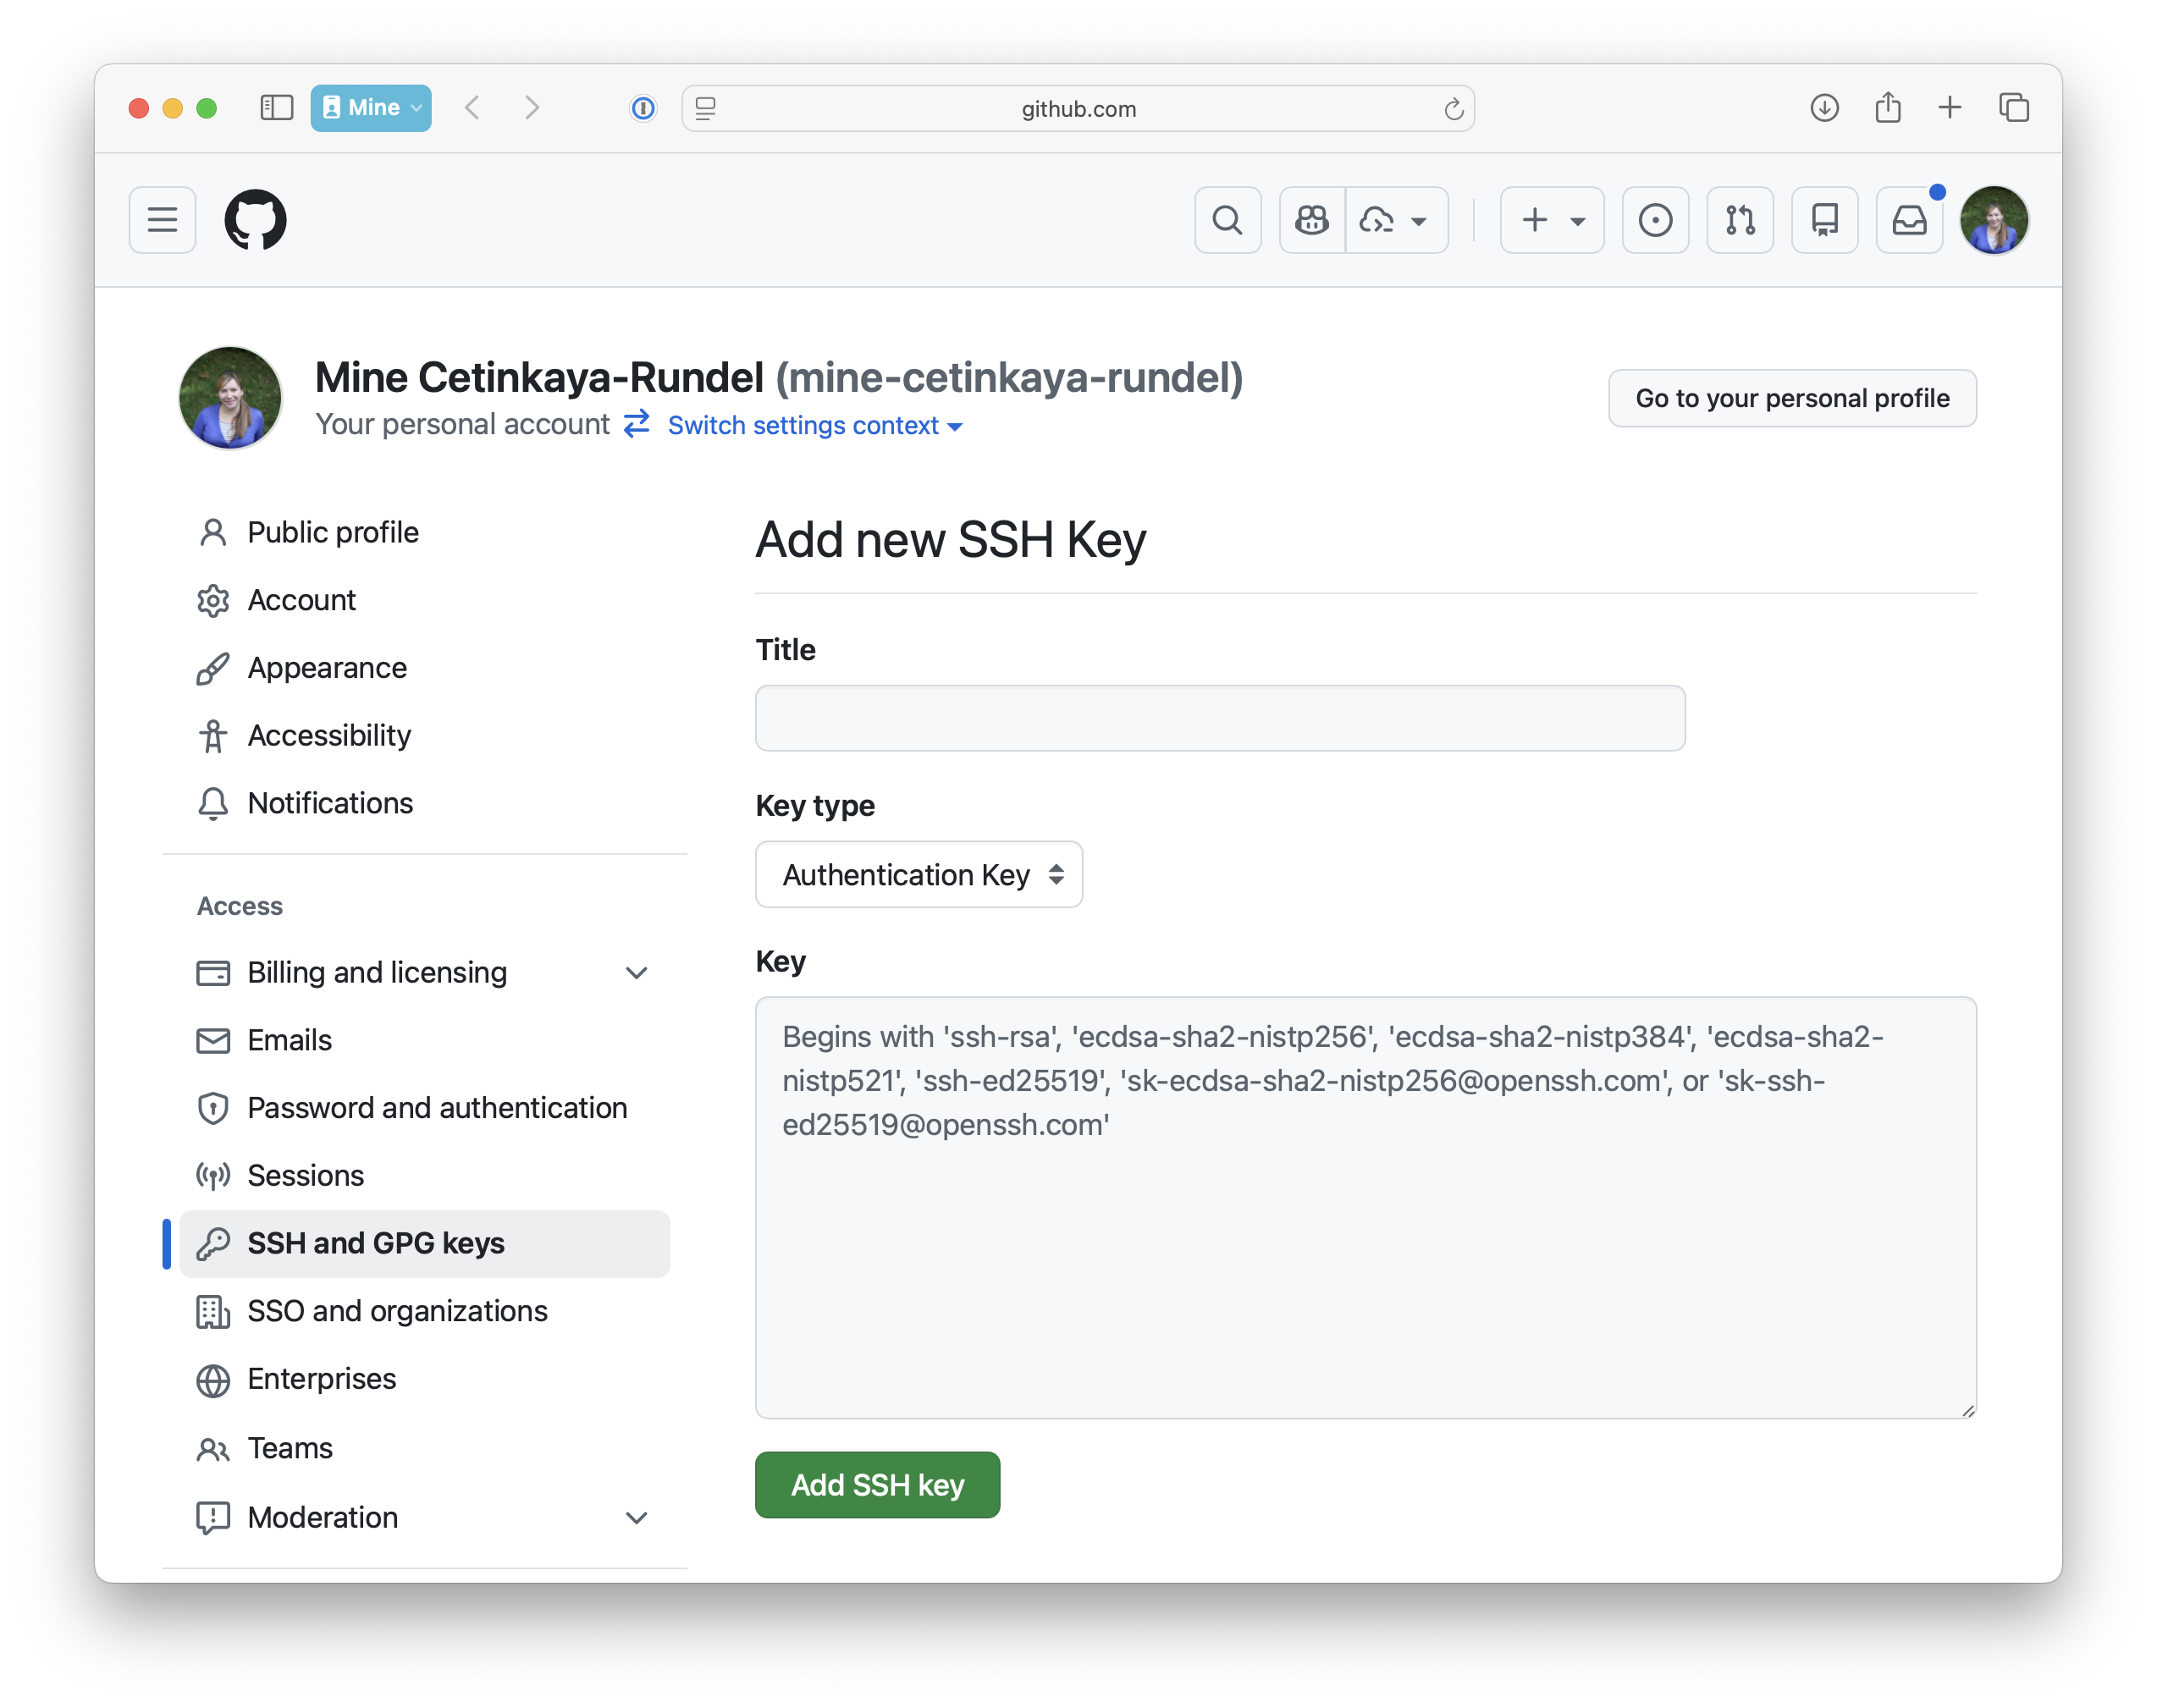
You should enter a meaningful name for the key and then copy and paste the entire public key

Once finished, you can click the green Add SSH key button. This key should now show in the list of GitHub SSH keys on https://github.com/settings/keys.
Step 3: Introduce yourself to Git
Finally, you need to configure your git so that Positron can communicate with GitHub. This requires two pieces of information: your name and email address.
Type the following lines of code in the console in Positron, filling in your name and the address associated with your GitHub account.
usethis::use_git_config(
  user.name = "Your name",
  user.email = "Email associated with your GitHub account"
)
For example, mine would be:
usethis::use_git_config(
  user.name = "Mine Çetinkaya-Rundel",
  user.email = "cetinkaya.mine@gmail.com"
)
Important
I used my gmail because that is the one I used to create my GitHub account. You should also be using the email address you used to create your GitHub account, it’s ok if it isn’t your Duke email. You can find this information at https://github.com/settings/profile under Public email.
Option 2: Local installation
This option is for students who prefer to install software locally and who are willing to put up with a bit up frustration at the setup stage in exchange for having a machine with a local setup you can use beyond this course. And note that this is not a forever commitment; at any point in the semester you can choose to abandon your local installation and continue on the departmental server using Option 1.
Step 1: Dowload and install R
Follow these steps if you do not already have R installed or you need to update your version.
- Go to https://cran.r-project.org/.
- Download R 4.5.2 for your operating system.
- Follow the installation instructions.
Steps for installing Python will be provided later in the course.
Step 2: Dowload and install Positron
Follow these steps if you do not already have Positron installed or you need to update your version.
- Go to https://positron.posit.co/download.html.
- Accept the license agreement by checking the box.
- Download Positron Positron-2026.01.0-147 for your operating system.
- Follow the installation instructions.
Once you’ve installed R and Positron, launch Positron, go to the Console and type
1 + 1R should return an answer: 2. You’re good to go to the next step!
Step 3: Install Git
Follow these steps if you do not already have Git installed. You can check if Git is already installed by opening a shell (e.g., Terminal) and typing which git and/or git --version.
- If Git is installed, you will see the path to the Git executable and/or the version number. You’re good to go!
- If not, you might see an error message indicating that the command is not found, e.g.,
git: command not found. Follow the steps below depending on your operating system:1
macOS:
Install the Xcode command line tools (not all of Xcode), which includes Git.
Go to the shell and enter one of these commands to elicit an offer to install developer command line tools:
git --version
git config
Accept the offer! Click on “Install”.
Here’s another way to request this installation, more directly:
xcode-select --installWe just happen to find this Git-based trigger apropos.
Note also that, after upgrading macOS, you might need to re-do the above and/or re-agree to the Xcode license agreement. We have seen this cause the RStudio Git pane to disappear on a system where it was previously working. Use commands like those above to tickle Xcode into prompting you for what it needs, then restart RStudio.
Windows:
Install Git for Windows, also known as msysgit or “Git Bash”, to get Git in addition to some other useful tools, such as the Bash shell. Yes, all those names are totally confusing, but you might encounter them elsewhere and I want you to be well-informed.
We like this because Git for Windows leaves the Git executable in a conventional location, which will help you and other programs, e.g. RStudio, find it and use it. This also supports a transition to more expert use, because the “Git Bash” shell will be useful as you venture outside of R/RStudio.
- Note: When asked about “Adjusting your PATH environment”, make sure to select “Git from the command line and also from 3rd-party software”. Otherwise, we believe it is good to accept the defaults.
-
Another note: Positron for Windows prefers for Git to be installed below
C:/Program Filesand this appears to be the default. This implies, for example, that the Git executable on my Windows system is found atC:/Program Files/Git/bin/git.exe. Unless you have specific reasons to otherwise, follow this convention.
Linux:
Install Git via your distro’s package manager.
Ubuntu or Debian Linux:
sudo apt-get install gitFedora or RedHat Linux:
sudo yum install gitA comprehensive list for various Linux and Unix package managers can be found at https://git-scm.com/download/linux.
Step 4: Configure GitHub authentication
If you’re using a local installation of Positron, HTTPS is usually easier to set up.
- In your browser, log in to GitHub.
- In Positron, in the Console, run
usethis::create_github_token(). This takes you to a pre-filled form to create a new PAT (personal access token). Click Generate token. Then, copy this token. Important note – you won’t be able to see it again once you leave the page. - Then, put your PAT into the local Git credential store by running
gitcreds::gitcreds_set()in the Console in Positron. This will prompt you to enter your GitHub username and the PAT you just created. Paste it and hit Enter.
Step 4: Introduce yourself to Git
Finally, you need to configure your git so that Positron can communicate with GitHub. This requires two pieces of information: your name and email address.
Type the following lines of code in the console in Positron, filling in your name and the address associated with your GitHub account.
usethis::use_git_config(
  user.name = "Your name",
  user.email = "Email associated with your GitHub account"
)
For example, mine would be:
usethis::use_git_config(
  user.name = "Mine Çetinkaya-Rundel",
  user.email = "cetinkaya.mine@gmail.com"
)
Important
I used my gmail because that is the one I used to create my GitHub account. You should also be using the email address you used to create your GitHub account, it’s ok if it isn’t your Duke email. You can find this information at https://github.com/settings/profile under Public email.
Test
You can now test that your GitHub authentication is working by attempting to clone and push back to a private repository.
Step 1: Create a GitHub repository from the template
- Go to https://github.com/vizdata-s26/test-setup.
- Click on the green button on the top right corner that says “Use this template” and choose Create a new repository.
- In the next window,
- General: Owner should be
vizdata-s26and repository name should betest-setup-YOUR-GITHUB-USERNAME(replaceYOUR-GITHUB-USERNAMEwith your actual GitHub username), e.g., mine istest-setup-mine-cetinkaya-rundel, if your GitHub username isdataVizAddictit would betest-setup-dataVizAddict. Under “Description”, you can write “Test repository for computing setup”. - Configuration: Keep it as Private.
- Jumpstart your project with Copilot (optional), you can leave it blank. And then click on Create repository.
- General: Owner should be
Step 2: Clone the repository
- Open Positron.
- In the top right corner, click on New -> New Folder From Git…
- In the pop-up window, paste the URL of your newly created repository. You can find it by going to your repository on GitHub and clicking on the green Code button, then copying the URL under either HTTPS or SSH, depending on which GitHub authentication you have set up.
Step 3: Make some changes to the repository
Make some changes to the contents of the repository and render your Quarto document.
Step 4: Commit and push your changes
In Positron, navigate to the Source Control tab from the Activity Bar. Stage your changes by clicking on the + button. Write a commit message. Push your changes by clicking on Sync changes.
Footnotes
These instructions are adapted from Happy Git with R, a fantastic (though more detailed than you need for the purposes of this course) resource for using Git with R.↩︎